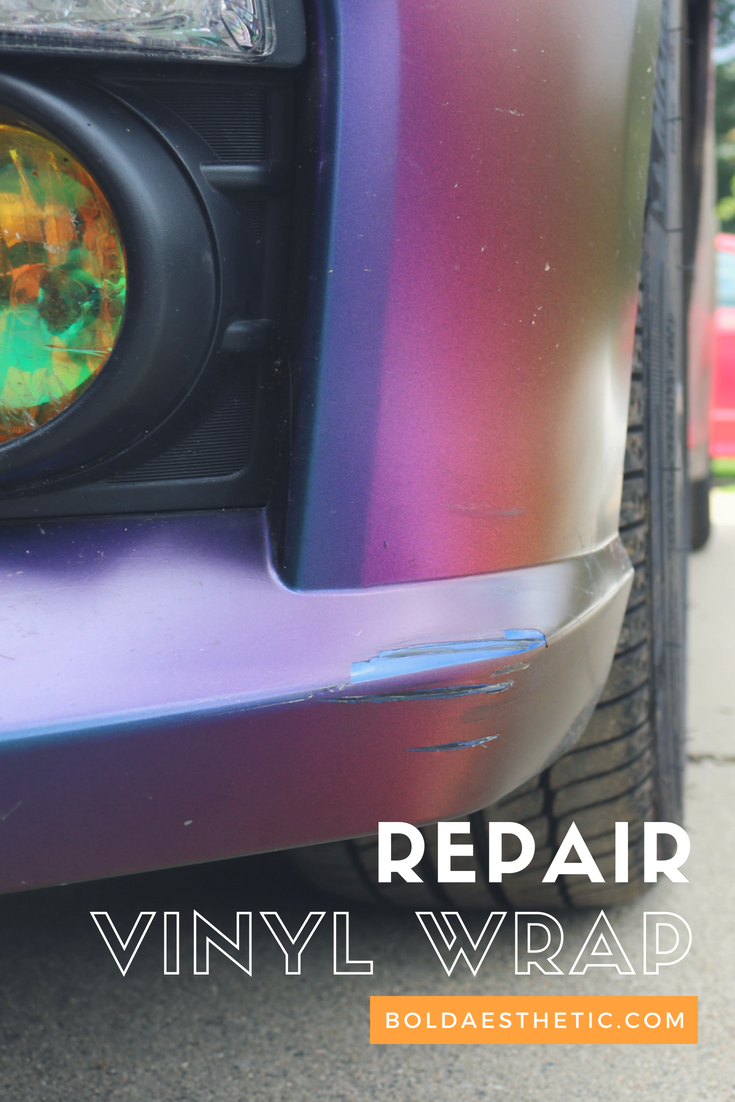
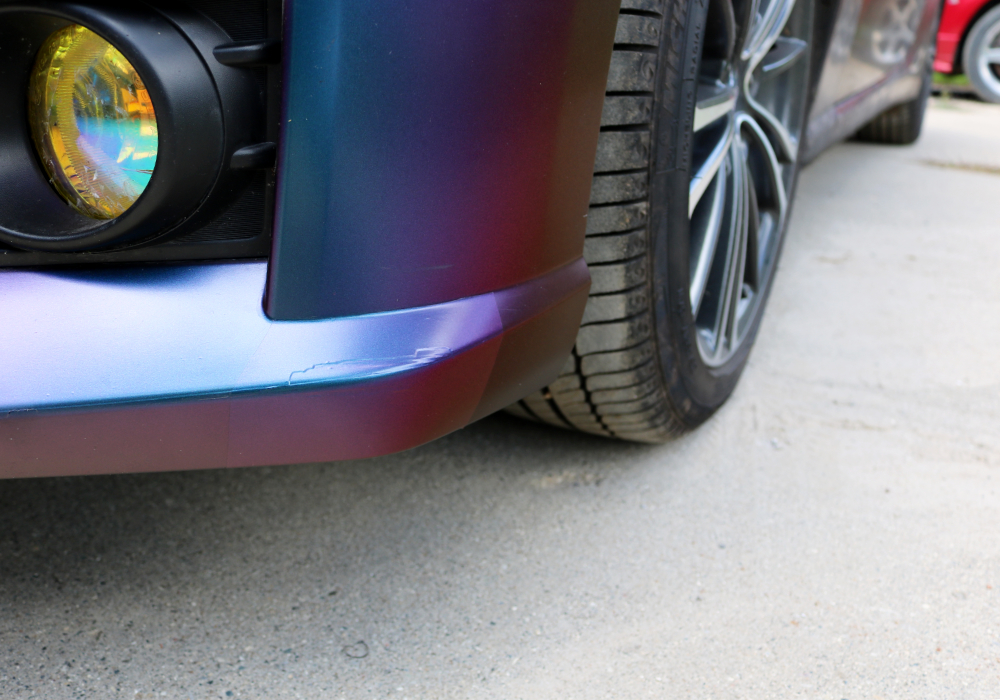
There comes a time during the lifespan of every vinyl wrap when a blemish appears. Some blemishes are small and indiscernible while others are large and in-your-face. Unfortunately, I have the latter.
This post contains affiliate links. I earn a small commission (at no extra charge to you) for each purchase made through one of my links. Rest assured! I only share links to products and services I use and love. Thank you for supporting Bold Aesthetic!
The left corner of my front bumper grazed a pile of wood siding on my driveway which left a devastating gouge. The amount of vinyl and paint removed would take a decent amount of money to repair. Since I don’t have that kind of money to throw around, I fixed the gouge myself and I wanted to share the process with you!
What You Will Need
- The same vinyl used on your car (mine is Avery Dennison Satin Rushing Riptide)
- Razor blade or Exacto knife
- Heat gun
- Microfiber towel
- Sanding block
- 2500 grit sandpaper
- Spray bottle (optional)
The Proper Way to Fix A Gouge
Let me start by saying that there is a correct way to fix any gouge or scratch on your car. Ideally, you want to sand down the affected area and then apply finishing putty so it’s flush with the rest of the car. Then you color-match your paint and apply a clear coat. However, when your car is vinyl wrapped you need to remove the damaged vinyl from the affected body panel first. Then after sanding, filling, and painting, you can re-apply the vinyl. The entire process easily adds up to over $500 and I don’t want to pay that when I still need to buy new wheels. So I decided to just patch the area.
How to Repair Vinyl Wrap
The entire process of patching my wrap took about 45 minutes. I’m sure it can take more or less time depending on the type of wrap you have or how perfect you want it done. Either way, you can repair vinyl wrap by patching the scratch or gouge if you follow these eight steps:
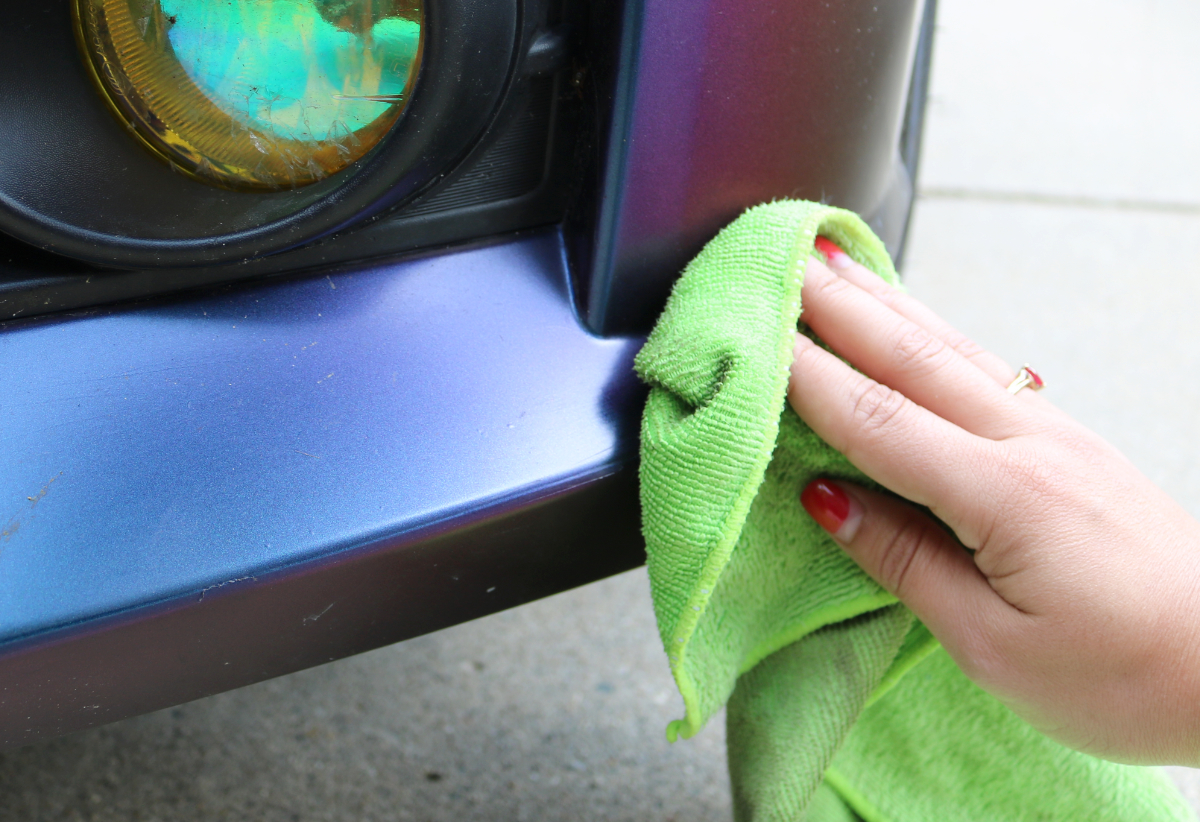
1. Clean the Damaged Area
Use a mix of water and dish soap to clean the area with a microfiber towel. It’s important to remove any debris, wax, and grease from your car before doing any type of body work.
2. Remove Vinyl Shrapnel
Use a sanding block with wet 2500 grit sandpaper to remove the vinyl shrapnel and level the gouge. Put light pressure on the block and sand horizontally, making sure to keep the area and sandpaper wet. NOTE: some gouges and deep scratches may need a lower grit sandpaper.
3. Re-clean and Dry
Clean and dry the area using a microfiber towel and water mixed with soap.
4. Measure Vinyl Patch Size
Measure and cut the vinyl needed for the patch. It should be large enough to cover the damage and overlap with a corner if possible.

5. Apply the Vinyl
Remove the backing and use your fingers or a credit card to start applying the middle of the vinyl.
6. Remove Air Bubbles
Work your way up and down, making sure to remove any air bubbles. You can use a heat gun to make the vinyl easier to stretch. However, over-stretching the vinyl can affect the appearance and may lead to tears in the future.
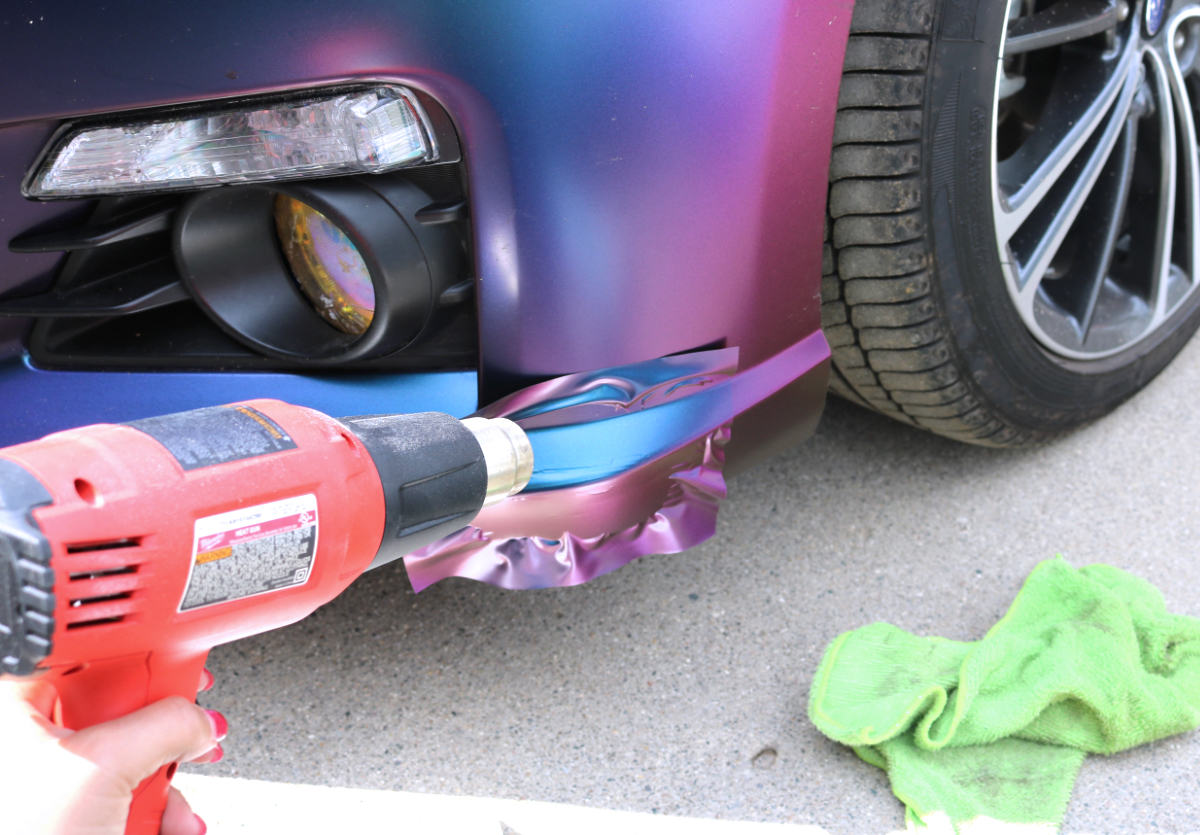
7. Adhere the Vinyl
Once the vinyl is applied, use a heat gun on any stretched surfaces, like curves or creases, to help adhere the vinyl.
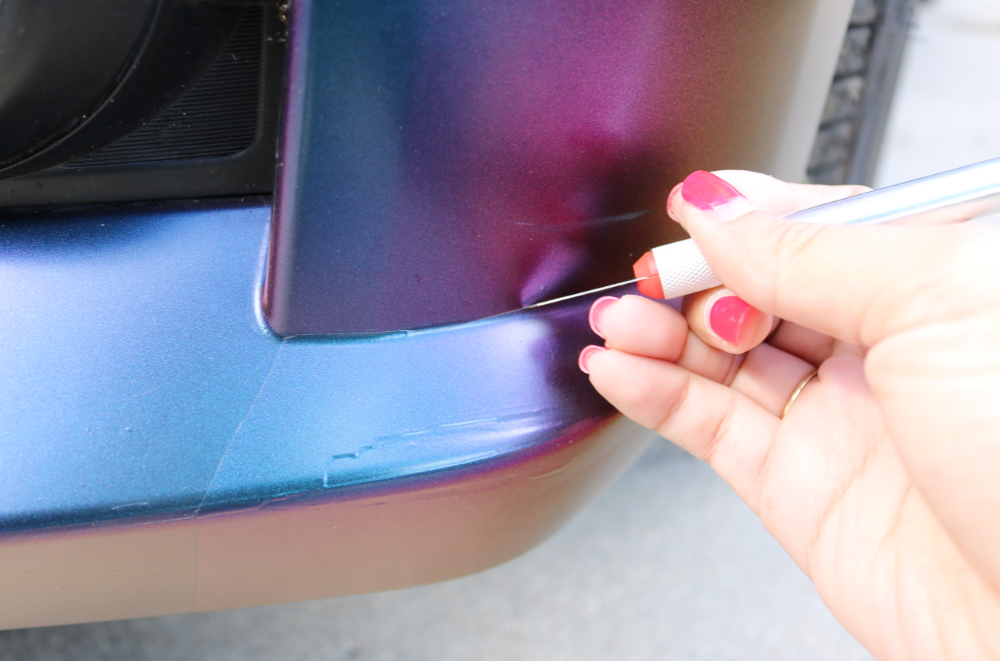
8. Remove Excess Vinyl
Finally, use a razor blade or Exacto knife to remove excess vinyl.
The final result is pretty damn good. Definitely better than a giant gouge exposing the ruined paint. Let me know if you experienced something similar to this! Or if you have suggestions on how to improve my quick-and-easy fix.
Hi, I looked at your vinyl repair method of the bumper. While it is in a rather inconspicuous area the end result is not seamless.
I have several small rock chips in a vinyl wrap hood and bumper, I used a paper hold punch to cut of vinyl patches to put on the chipped spots but it is not seamless and the cut edges of the wrap are a different colour then the surface of the wrap.
Do you have other techniques that would be seamless for small rock chips?
I have several rock chips in my hood vinyl wrap also, but I haven’t tried to fix them as I drive 100 miles round-trip on the highway everyday for work (I would just get more haha). It seems your solution is a good fix. My only suggestion for improvement is to sand the damaged spots similar to how you would mud and sand drywall – you want to make the edges blend together so that there is no “drop-off”. If I spent some more time sanding or even just filling in the damaged area on my bumper, it would look 10x better!
Can u guys repair my white wrap on my car got some scratches I’m not sure
I recommend searching for a car vinyl shop near you. If the scratches are all on one panel then they can typically rewrap the entire piece for a couple hundred dollars.