My driver’s license was suspended after I moved to Michigan because I got three speeding tickets in less than a year. I seriously don’t know how I managed to do that since I never got a speeding ticket when I lived in Illinois. Luckily, I didn’t have my Michigan driver’s license yet so only my Illinois driver’s license was suspended. YES! LOOPHOLE! But in order to avoid getting any more speeding tickets, I got a Valentine One V1 radar detector.
 This post contains affiliate links. I earn a small commission (at no extra cost to you) for each purchase made through my links. Rest assured! I only share links to products and services I use and love. Thank you for supporting Bold Aesthetic!
Valentine One V1 Radar Detector
I admit that I’m not an expert when it comes to radar detection, but I do know that Valentine One is top of the line. I specifically chose the Valentine One V1 radar detector because it has two radar antennas – one forward and one rear – which gives you full 360° coverage. The antennas can detect a radar signal from any direction… even if your driving through a curve!
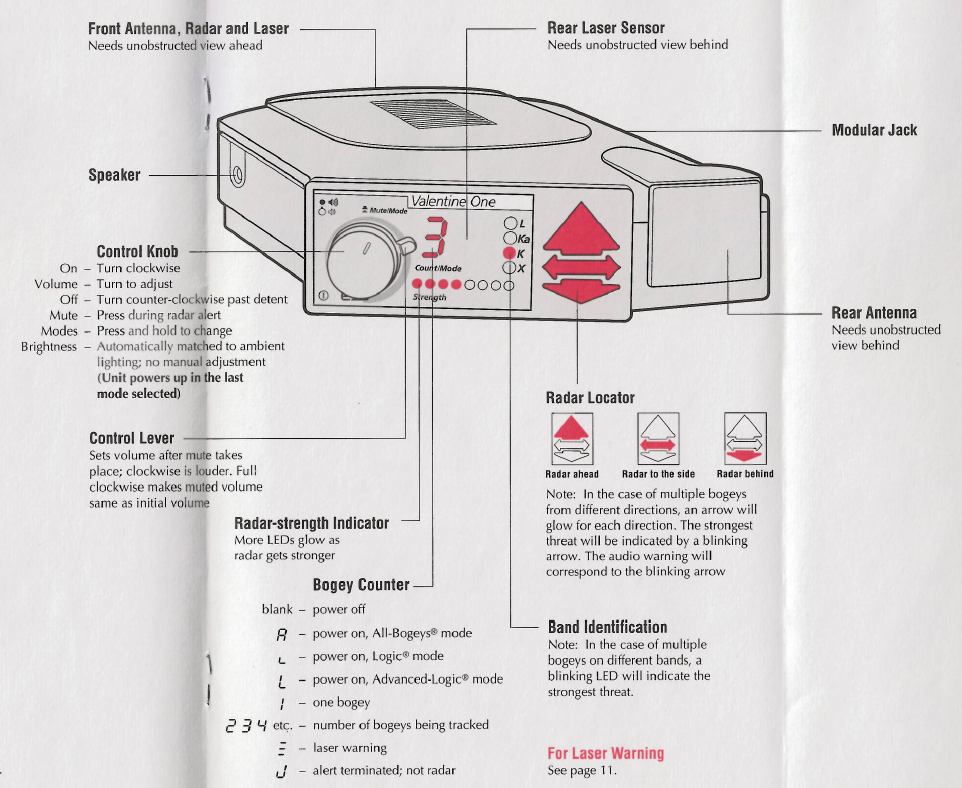
The location of the radar source is indicated with an illuminated arrow and the number of radar units, or “bogeys”, detected is displayed on the bogey counter. The owner’s manual does a great job explaining the different radar bands detected, but I’ll cover them briefly for your convenience.
Radar Detection
Valentine One detects all radar bands and each one is associated with a different alert sound. It only took me a couple days to distinguish between the alerts, so I didn’t have to keep checking the radar display to see what was detected. The three most common bands in the USA are X, K, and Ka.
- X-band is often found at long distances. It’s considered a catch-all band because the frequency is shared with burglar alarms and door openers. I recommend adjusting the Valentine One to a lower sensitivity if you live near a shopping area. Otherwise you’ll constantly hear the X-band alert (“Beep”), notifying you of door sensors.
- K- and Ka-bands are usually detected at closer range so they are more likely to be radar. While some door sensors and cheap radar detectors are beginning to use K, the Ka-band remains a reliable warning of radar.
The Valentine One also detects laser. However, all laser encounters are like instant-on radar which means there is no advanced warning. Pay attention to the direction identified and be prepared to respond.
What’s Included?
I recommend buying a new Valentine One V1 radar detector instead of a used one because the warranty does not transfer between owners. Plus, any software updates are easier to get if your email account is attached to the device. The original package includes everything you need to install and use the radar detector easily.
- Valentine One radar detector
- Windshield mount
- Visor mount
- Lighter (12V outlet) adapter
- Coiled telephone cable
- Straight telephone cable
- Spare suction cups
- Direct-wire power adapter
- Wiring-harness connector
- Owner’s manual
- Spare fuse
You don’t need any specific tools to install the Valentine One V1 radar detector unless you want to splice into the ignition wires to avoid using a 12V power outlet. Since I didn’t feel comfortable doing that, I just strategically hid the flat telephone cable and used the 12V power outlet located in the glove box. If you happen to have the same setup, then you can follow my instructions!
Concealed BRZ/FRS Install
You can use the 12V adapter and coiled telephone cable instead if you plan to use the radar detector with multiple vehicles, but I typically only drive my BRZ so I wanted a clean concealed install that didn’t require electrical work.
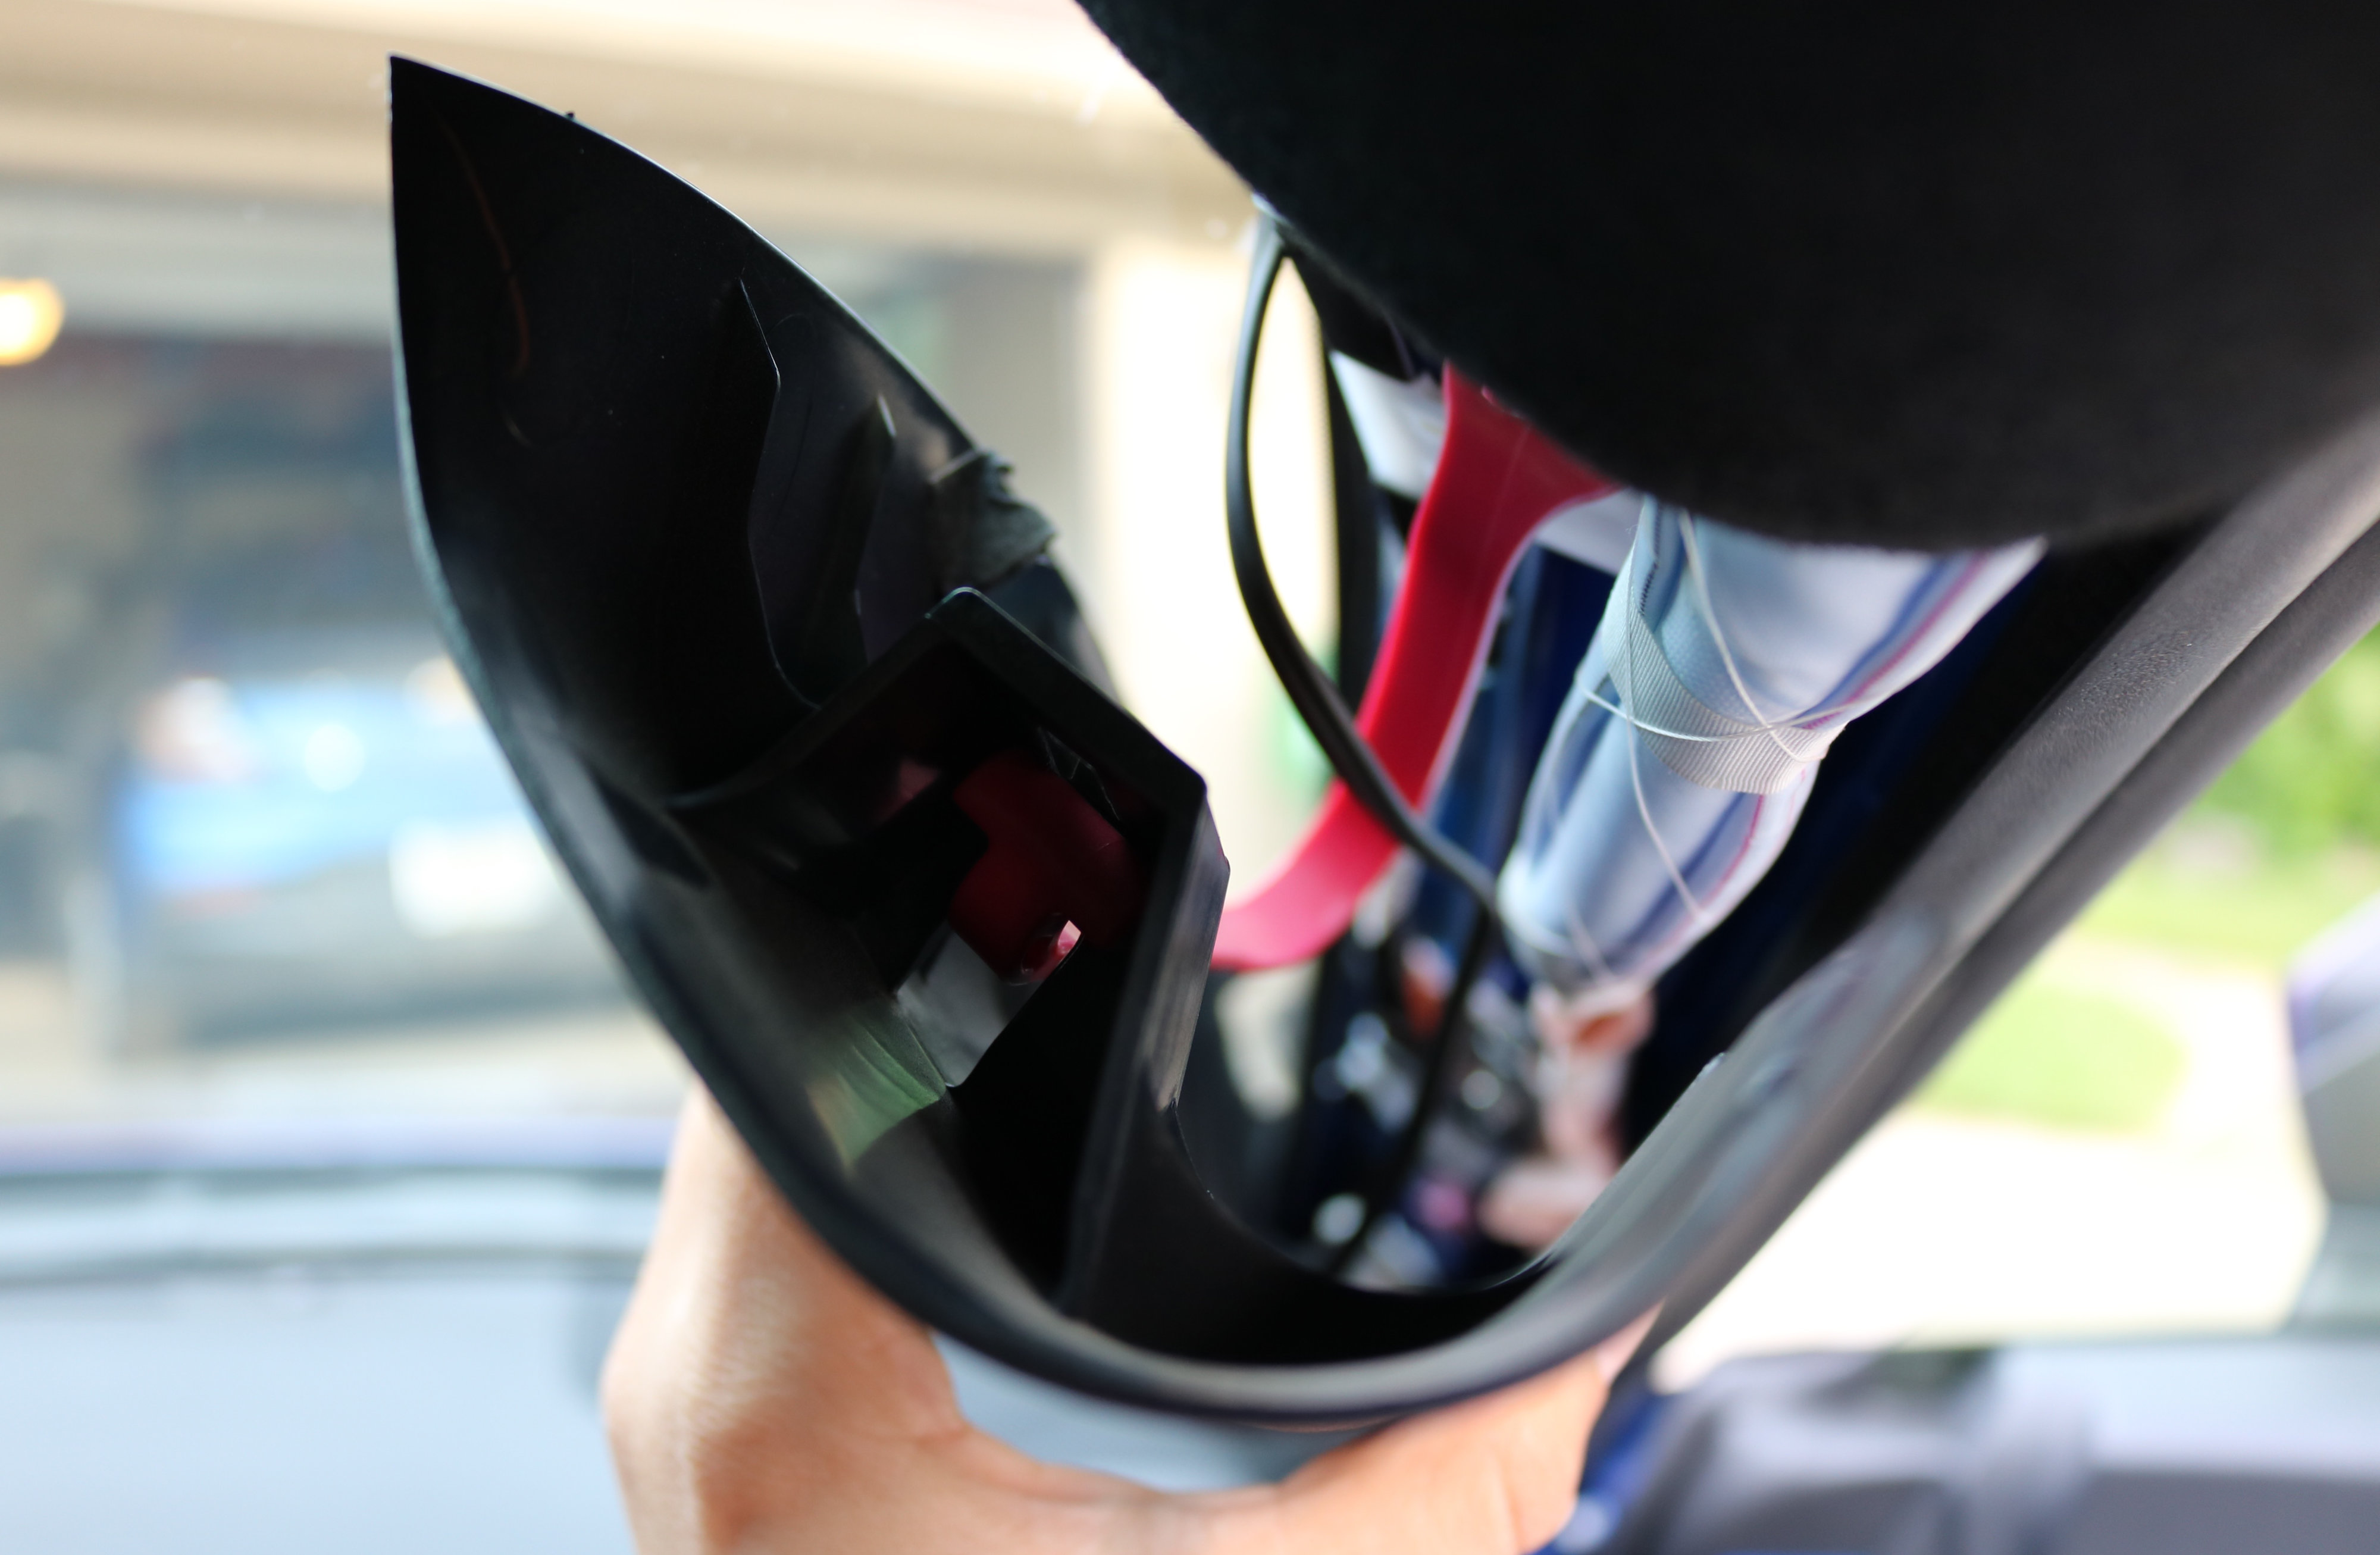
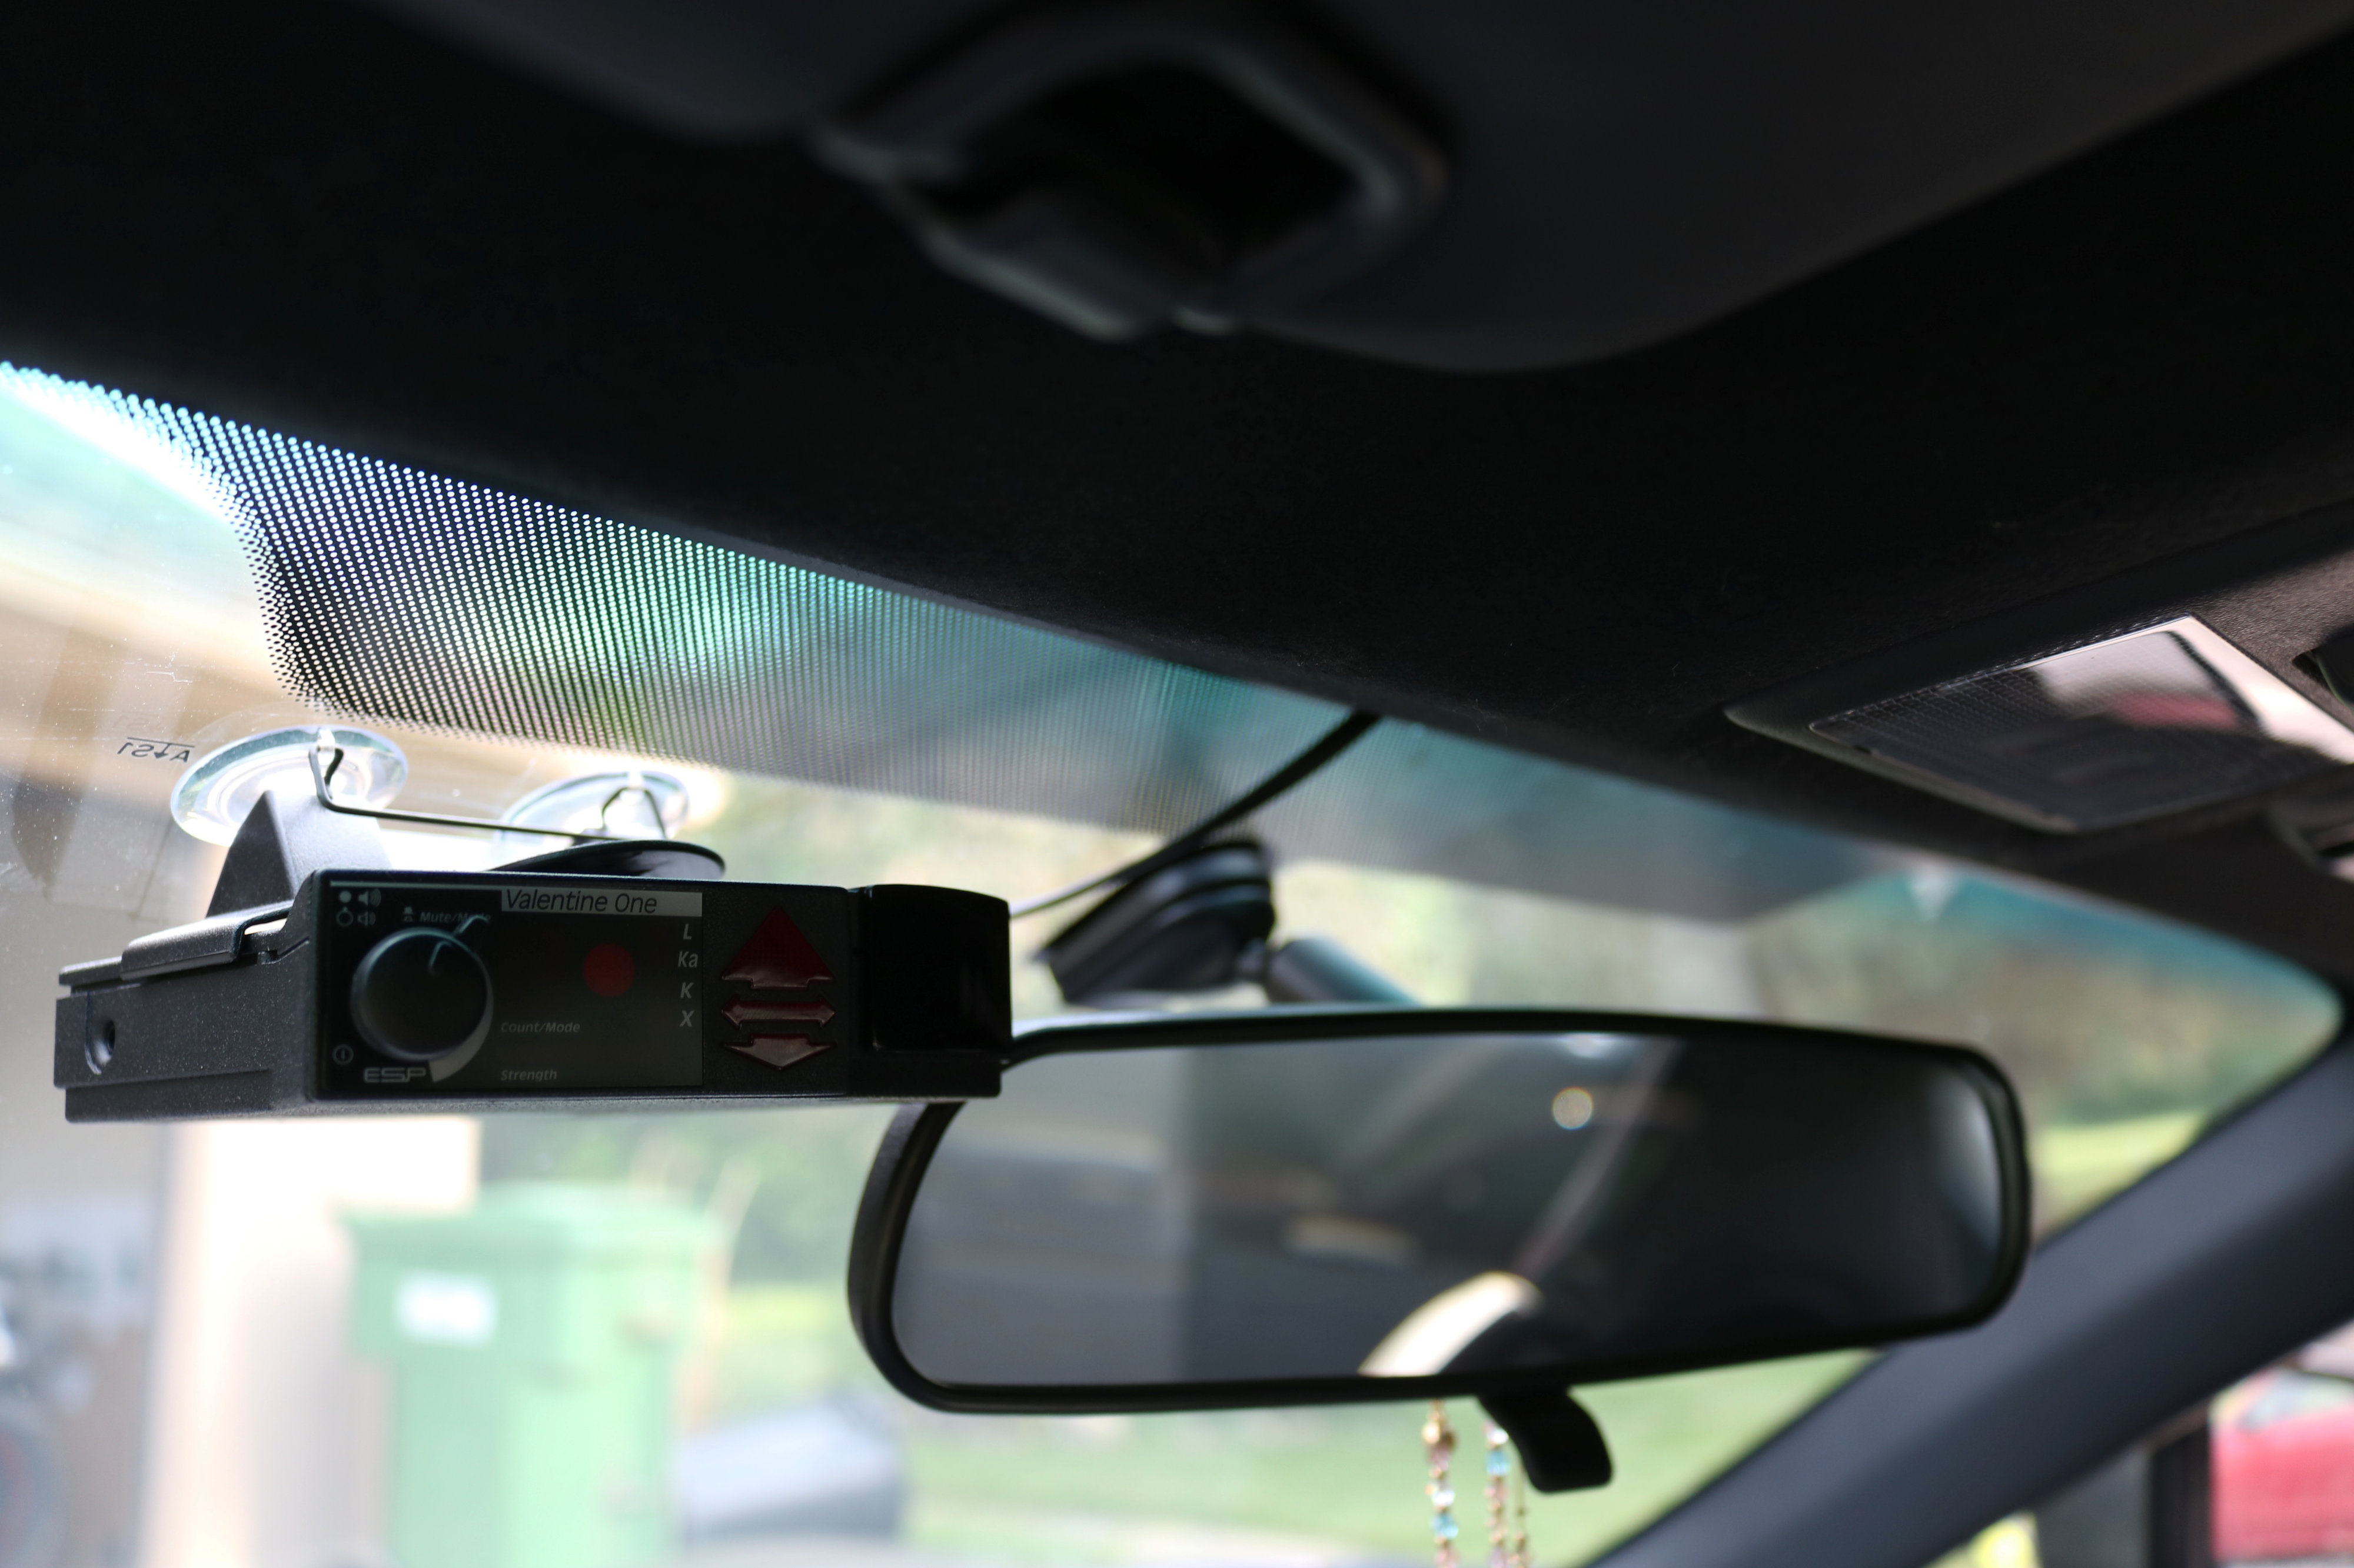
First, I mounted the Valentine One V1 onto the windshield so that it has a clear view ahead and behind. Then, I tucked the flat telephone cable into the ceiling liner behind the rear-view mirror using my fingers. I removed the passenger side A-pillar trim to run the cable down to the glove box – I literally just squeezed both sides and it popped right off.
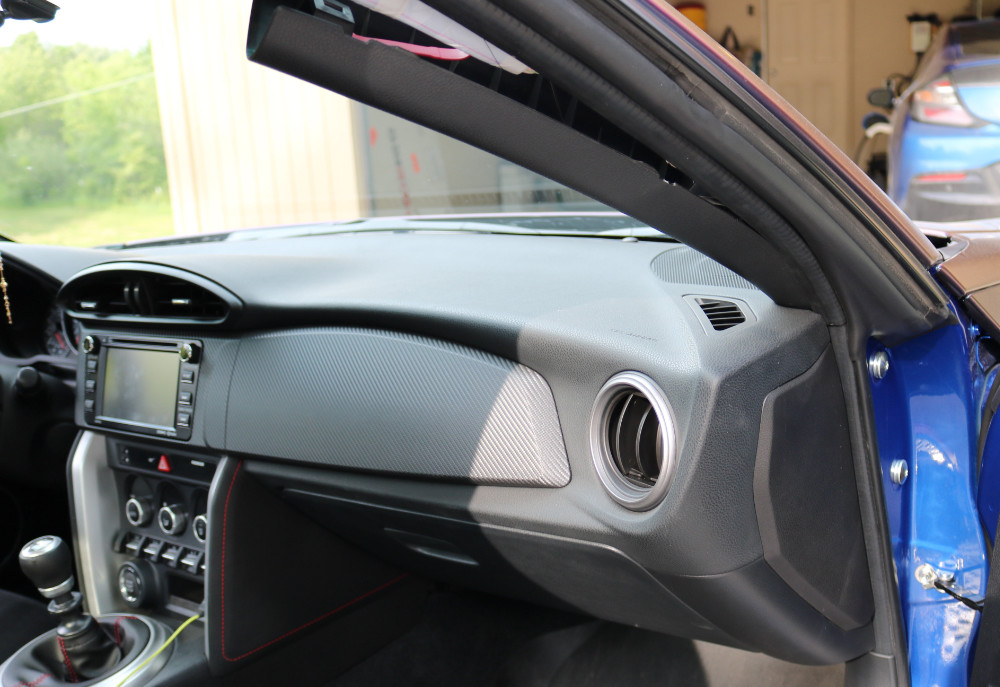 Once the cable was behind the A-pillar trim, I tucked it behind the door-jam trim next to the dashboard. It took some effort, but this is where I managed to squeeze the cable behind the glove box. I had to snake the cable upwards behind the glove box through a small opening, but it was pretty easy. After I attached the cable to the 12V adapter and plugged it in, I turned on the car to make sure it worked – and it did!
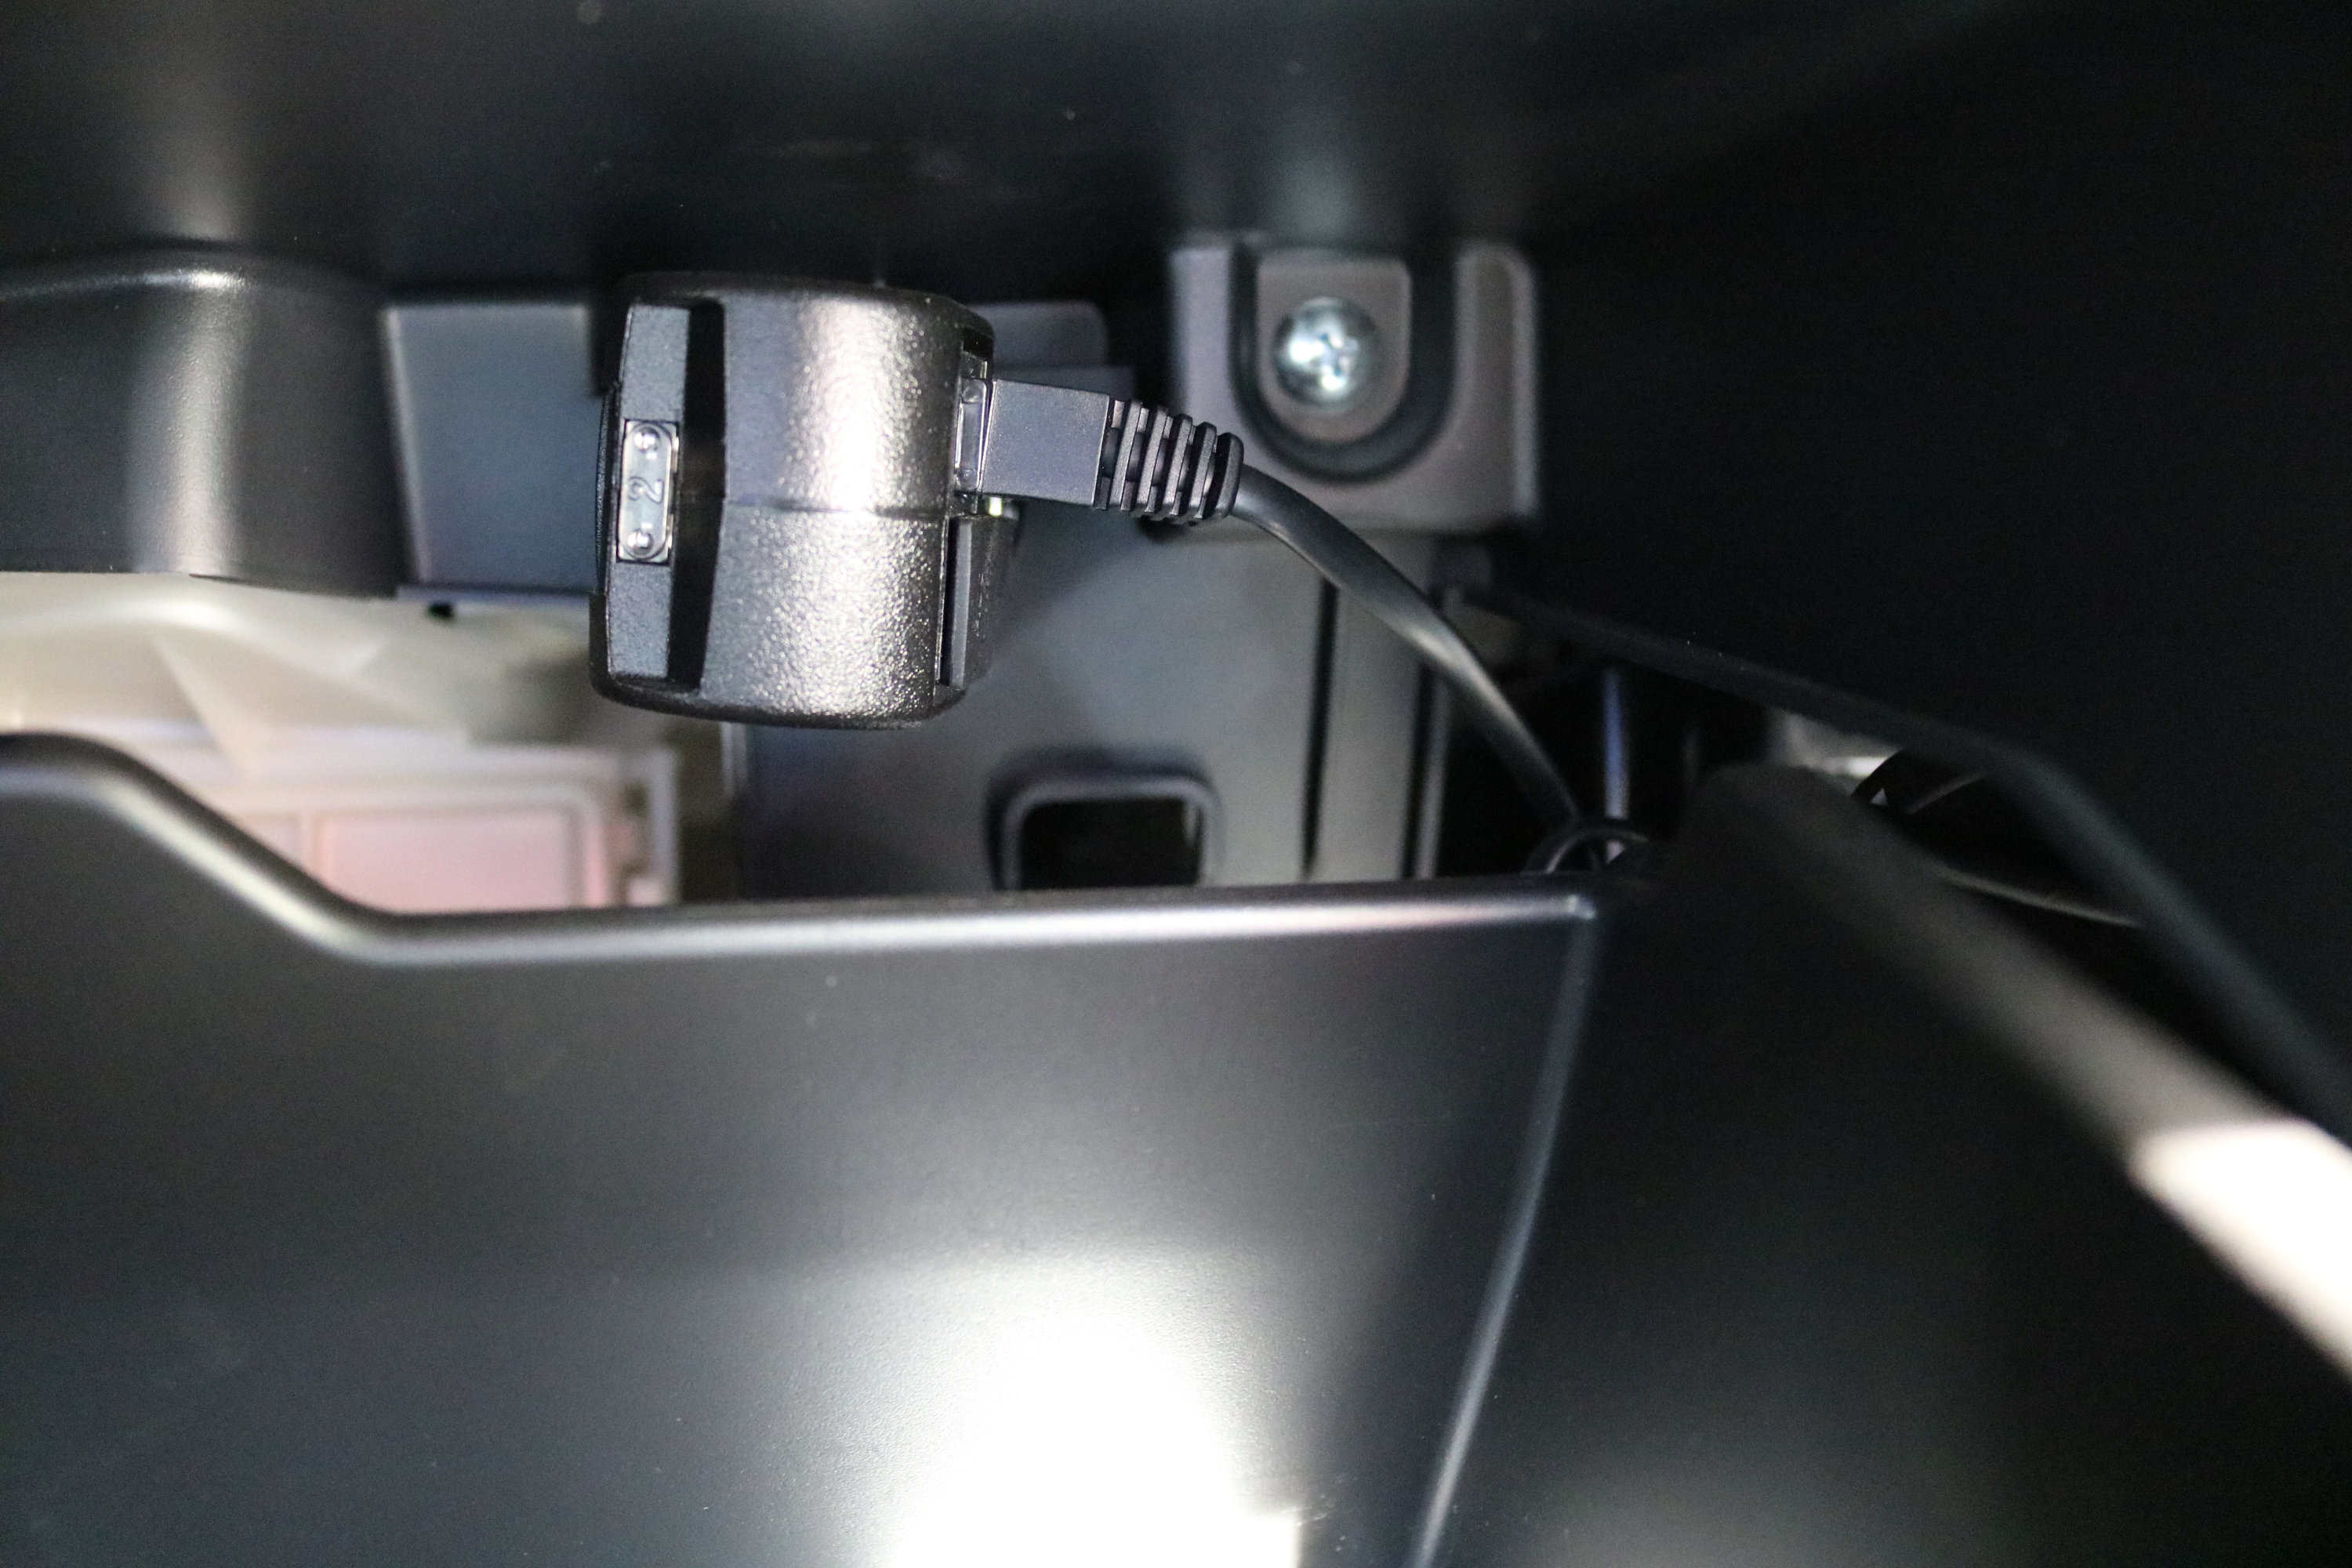 I carefully put the A-pillar trim back on and made sure the excess cable was tied off inside the glove box. The install looks really clean and only took about 15 minutes – much easier than messing with electrical things.

I’ve owned my Valentine One V1 radar detector for over 18 months. It’s a great investment and one of the nicer things in my life. I hope this short review and install guide was helpful! Please be aware that some states may have laws against the use of radar detectors.
Leave a Reply